Pages

Saturday, May 2, 2020

Sombreado in auto cad in english

Sombreado auto cad

As we know guys Auto Cad is computer aided designing software which is most popular among engineering designing professionals. Auto cad has many 2d and 3d command for making its work very easy so today we will discuss a 2d command that is Sombreado. There we will understand it with an example and also get knowledge about its parameters in auto cad software.

What is Sombreado in auto cad?

Sombreado is a name of 2d command in auto cad software. We known it as hatch command in auto cad. So today will we discuss all about hatch command for getting introduce with sombreado command. So let us under this command through some example in auto cad.

How to use Sombreado in Auto Cad?


So let us start our topic and learn about Sombreado command in our drawing of auto cad.

Before going through this method let us have a quickly review on the User Interface of this software so that handling of this software become easy for us. Starting from top here we have different Menus such as Home menu, Insert Menu, Annotation menu and some others, each of them helps us for managing of command and tool of this software, move to next section that is display window which is at the middle of this software, in this window you can see your drawn object of any drawing or whatever you draw in this software that will be display on it, if we talk about button end of this software then there are many option of navigation which helps us in handling of parameters during our working in this software.

This is Drafting and Annotation workspace screen of this software which is set as by default screen of this software.


For sombreado command let us make a drawing of an engineering drawing. We will make this type of plate shape as a part of any particular machine. Here in this shape we have three whole two for locking it with machine and center one is for shaft of machine.


Now i want to show cross section of this plate from front view and top view. So i will click on Hatch command which you can find in draw menu of Home tab of this software.


Or you can press H button of keyboard then press enter for making Hatch command active.


When you click on this command then a tab will be open in command section of this software which is named as Hatch creation. In Hatch Creation tab you will find all its parameters.


Now choose any one of the pattern for your part on which you want to apply hatch. I will click on this pattern in pattern tab of hatch command as hatch pattern of my plate.


Now you can choose any one of two methods of applying hatch on your part that are Pick point method and Selected method. I will show you both methods one by one. Let us first discuss pick point method. So click on icon of this method in Boundaries tab of hatch command.


Then hatch command will ask you to select a point inside your object. So i will click on here because when i cut this plate from center for showing cross section then there will be solid port leaving holes. Now make click for apply this pattern.


Now let us discuss second method that is Select method. Click on the icon of this option. When you click on it. Command will ask you to select the boundary of your desired hatching part. So i will select the boundary of this part of plate and make click then hatch will apply to my object like this and covers all the area inside circle of this plate.


So you can choose any one of the two methods according to your requirement.

If you want to remove your applied hatch then click on the icon of Remove tab of hatch command.


Now it will ask you to select the bundary of object of which hatch you want to remove. So i will click on this boundary and make click.  When i make click hatch will be remove from this object.


Now let us see the different parameters of this command which you can manage from the different type of  options of hatch command.
Or again take hatch command ans apply it now object. Now click on Settings option for the different parameters of this command. 


When you click on Settings option a popup box will open. You can make different settings of hatch from here also which we will discuss in continuation of our article.
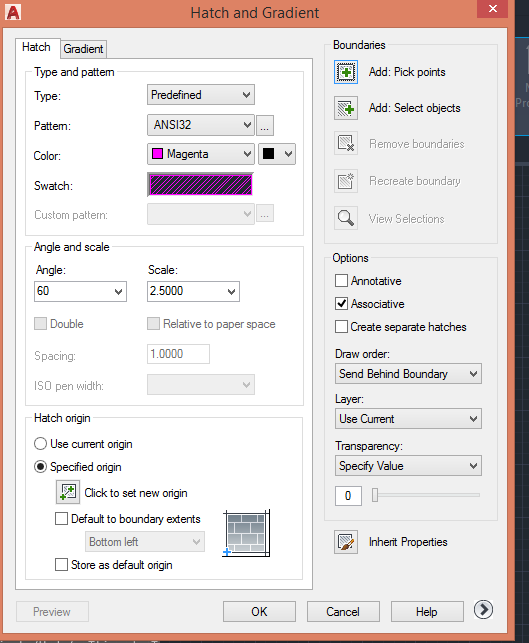


Now let us analyze each option of parameters of hatch command. First if you want to change the color of hatch line then there is two options, first is choose your desired color or change after applying hatch on object. So for hatch line color go to this option an choose your desired color and  hatch line color will be change as your chosen color.


Now you can choose color of blocks of hatch from this option. As hatch line we can change color before drawing hatch or after drawing hatch on our object. If i choose this color then blocks color will change like this.


You can manage visibility of hatch by managing the value of hatch transparency. For example i select this hatch then decrease the value of hatch transparency. Then visibility of hatch become dull as shown in figure.


You can change the angle of hatch from Angle option of Properties tab of hatch Creation bar. If i enter 134 degree as hatch angle then hatch will incline at 134 degree.


You can manage density of hatch lines or blocks on any particular object. For increasing density decrease scale vale from scale option of Properties tab of hatch creation bar or for decreasing density increase scale value.


You can choose origin point of hatch from this option.


Just click on it and choose origin point in your object then hatch lines or block will start from your chosen point.


Next option is Match property. It will help you if you want to copy any applied hatch of any object of your drawing. For using this option click on it then select hatch which you want to reuse on other object of your drawing.


Then click on object on which you want to apply it.


So this is all about the Sombreado in Auto Cad. You can now handle its parameters without any problem and use it for making good engineering drawing. After this article there will be no doubt in your mind about Sombreado of Auto Cad.

Thursday, April 30, 2020

Figuras auto cad in english


Figuras auto cad

As we know guys Auto Cad is computer aided designing software which is most popular among engineering designing professionals. Today we will discuss about figuras and also get knowledge about cad blocks of auto cad software which we can download from internet and use them as a block component in your drawing working of any layout plan project.

What is Figuras in auto cad?

You can import pre made block diagram in autocad for making layout of any project plan. You can also save your time by using these blocks diagram. If you talk about figuras then you can understand it as a bunch of block diagrams of same component with different design or variation.


How to use Figuras in Auto Cad?


So let us start our topic with cad block and we will download it from internet and learn about Figuras in our drawing of auto cad.

Before going through this method let us have a quickly review on the User Interface of this software so that handling of this software become easy for us. Starting from top here we have different Menus such as Home menu, Insert Menu, Annotation menu and some others, each of them helps us for managing of command and tool of this software, move to next section that is display window which is at the middle of this software, in this window you can see your drawn object of any drawing or whatever you draw in this software that will be display on it, if we talk about button end of this software then there are many option of navigation which helps us in handling of parameters during our working in this software.

This is Drafting and Annotation workspace screen of this software which is set as by default screen of this software.

For seeing full image click on the image.


Here we will discuss how to download figuras from internet and how to use figuras in drawing? So for our topic go to search engine and search for cad blocks in the search box of browser. Open any one of the block website. Now you can download file of any one object. Let i download the human figuras for our learning.


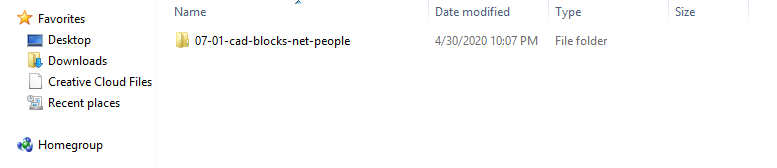
Now a zip file will be download. Extract this file. Then go to the folder of this cad block.


And make double click on the file.


When you make click these option will come in popup window. Choose Auto Cad launcher option.


When you make click on the file it will automatically open in auto cad. Save it into your folder from the Save as command of File menu for its better use.


Now you can copy any block diagram from here. For copying select it and press Ctrl + c as short cut command of copy


Then go to your drawing of auto cad and paste it there by pressing Ctrl + V. You can make multiple paste.


If the block diagram of your object is very large in scale then scale down it by using scale command. For using scale command take scale command from the modify tab of Home menu of this software then click on the object and press enter now specify the point around which you want to scale it  and press enter key then scale it according to your or you can enter the value of scale factor manually through keyboard.


Now place it at your desires place in your drawing by using move command.

You can also store any one of the block from the figuras of blocks into tool panel of this software. For storing press Ctrl + 3 from keyboard for opening Tool panel then make right click and click on New Pallet for making your own pallet.


Now name it as human model. You can name it according to you then copy a block then past it into this tool pallet. It will paste like this.


And this will save into your tool panel for your future use.

You can directly move a block and leave it into current drawing tab as shown in figure.


So this is all about the figuras in Auto Cad. You can now handle its parameters without any problem and use it for making good plan layout of engineering drawing. After this article there will be no doubt in your mind about figuras of Auto Cad.


Tuesday, April 28, 2020

Composition settings after efftect in hindi pdf

Composition settings after effect in Hindi


आज हम After Effects के Composition settings के बारे मे बात करेंगे और इस Software  के बारे मे विस्तार से जानेगें। जैसा की आप जाने है कि After Effects एक Motion Graphics का  software है, जो कि graphics professionals के द्वारा उनके  professional काम के लिए प्रयोग किया जाता है।  अतः अब हम इस software की composition Settings  को समझते हैं। 

लेकिन इस topic  को शुरू करने से पहले हम After Effects के सभी महत्वपूर्ण points को देख लेना चााहिए जिससे की इस Software को प्रयोग करना हमारे लिए आसान हो जाये। इस software के महत्वपूर्ण points इस प्रकार हैं।

  • After Effects क्या है?
  • After Effects  के systems requirement क्या हैं?
  • After Effects में कैसी file support करती है?
  • After Effects की compositing settings.
ये चार प्रमुख बाते आज हम अपने इस article  में देखेंगे।

After Effects क्या है?

After Effects एक ऐसा साफ्टवेयर है, जो कि motion graphics पर काम करता है। आप इस में कई प्रकार के Animation भी बाना सकतें हैं   इसके  tools और अलग अलग features का प्रयोग करके। जैसे logo animation, advertise animation, cinematic effects आदि। आप कुछ plugins का प्रयोग करके इस software में और भी रोचक काम कर सकते हो motion graphics से सम्बधित।

After Effects  के systems requirement क्या हैं?


After effects जनवरी 1993 मे adobe Inc. के द्वरा बनाया गया था एक Motions graphics software के तौर पर, और आज यह adobe systems के creative cloud app का part है। ये  software Windows 10, Mac OS और इनके आगे के versions मे आसानी से चल सकता है। अगर आप इस  software को अपने laptop या personal computer या  tablet मे install करना चाहते हो तो आप को इन  system की requirement होगी। 

For Windows
  • Processor required: Multi-core Intel Processor (64 bit)
  • Operating system required: Microsoft Windows 10 (64 bit) and its later versions
  • RAM required: 16 GB minimum required (32 GB recommended)
  • Hard disk Space required: 5 GB required (Additional free space required during installation of  software)
  • Monitor resolution required: 1280 X 1080 or greater
For Mac OS
  • Processor required: Multi-core Intel Processor (64 bit)
  • Operating system required: mac OS 10.13 and its later versions
  • RAM required: 16 GB minimum required (32 GB recommended)
  • Hard disk Space required: 6 GB required (Additional free space required during installation of  software)
  • Monitor resolution required: 1440 X 900 or greater

आगे इन software के activation key और update करने के लिए internet connection की आवश्यकता होगी।


अब After Effects software  की systems requirement की जानकारी के बाद आप के दिमाग मे ये question आ रहा होगा कि कैसा files format इस software  मे supports करता है। तो चलिये हम इसमे supported file  पर एक नजर डालते हैं।

Which type of file format supported by After Effects?


बहुत सी file format After Effects में support करती हैं, लेकिन हम यहाँ कुछ महत्वपूर्ण  file format को  ही देखेगें। ये इस प्रकार हैंः 

Audio File Formats

MPEG (Moving Picture Expert Group) formats such as MPEG, MPG, MPE, MPA,M2V, MP2, M2A, M4A, M2T, M2P, MPV, VOB, MOD, AC3, MP4, M4A, M4A.
AIF/AIFF (Audio Interchange File Format): it can be import and export both.
WAV (Waveform) it can also be import and export both.

Image File Formats:
  • Al, PS, EPS (adobe illustrator): these can import only in this software.
  • PDF (Portable Document Format): It can import only.
  • PSD (adobe Photoshop): it can both import and export in this software.
  • BMP, DIB, RLE (Bitmap): It can import only in this software.
  • JPEG/JPG (Joint Photographic Expert Group): It can both import and export in this software.
  • PNG (Portable Network Graphics): It can import and export both in this software.
  • TIFF/TIF (Tagged Image File Format): It can both import and export in this software.
ये कुछ महत्वपूर्ण file format हैं, जो Audio file format और Image file format के आधार पर हैं। 

Composition Settings of After Effects


पिछले After Effects  के User interface blog मे हमने इस software के सभी भाग को समझा था। अतः अब हम इस  article को समझना शुरू करते हैं।

What is Composition in after effect?


इस software में हमारे द्वारा किये गये सभी काम एक  Composition  के रूप मे बनते हैं। Composition में layer हो सकती हैं, कई प्रकार के effects हो सकते हैं।

चलिये अब हम after effects मे composition कैसे बनाते हैं, ये सीखते हैं।

How to make composition in after effects?

कोई भी नया काम after effects में शुरू करने के लिए हमें composition की जरूरत होती है। Composition  हम तीन  तरीके से बना सकते हैं। पहला है menu bar पर  जाऐं जो कि इस software के सबसे ऊपरी भाग में है, और Composition menu पर click करें। आप जैसे से ही click करेंगें। एक popup list खुलेगी, अब list के New composition option पर click  करें।


दूसरा तरीका है Project panel मे जाओ जो कि इस software के बायें भाग में है, और Project panel मे  mouse  के right button  से कहीं भी click करें। एक popup list  खुलेगी,  New composition option पर click करें। 


तीसरा तरीका है इस  Project panel  के नीचे भाग में इस small icon के  Create a new composition option पर click करें।


आप composition बनाने के लिए इसमें से कोई भी तरीका ले सकते हैं।  अब जब आप इनमें से कोई तरीके लेते हैं तो एक  Composition settings box खुलता है इस प्रकार से। इस box में बहुत से  para meters है, जिन्हें हम एक एक करे के समझेगे इस blog  के दौरान। 


पहला option  नाम का है। इस box में आप आपने composition का नाम दे सकते हो जिससे आप आगे उस नाम से इस ढूढ़ सको। उदाहरण के लिए अगर आप एक  logo animation बना रहे हैं, तो आप इस का नाम  'My logo animation' दे सकते हैं, ये आप की इच्छा पर निर्भर करता है।


अगला option है composition display window का Presets. आप इसे ऐस समझ सकते हो की ये composition window की उस dimension को बताता है, जो कि आप के animation या motion graphics को display की जाने वाली screen  के बराबर होती है। यहाँ आप को बहुत सारे Presets  मिलते है इस list में आप इसमें से कोई भी आपनी आवश्यकता के अनुसार choose कर सके हो या फिर आप अपना खुद का preset  बना सकते हो।


अगला option  है Frame rate. हम इसे fps में measure करते हैं, जिसका मतलब हो है   frame per second.  आप इसे ऐसे समझ सकते हो की आप का  animation  हर second में कितने frame cover करेगा । हमारे पास यहाँ कुछ pre-define frame rate है। जैसे अगर आप 24  लोगे तो आप का animation 24 frame cover करेगा एक second में।


अगला है  Duration. Duration  वो होता है जितने  second की of animation  आप बनाना चाहते हो। जैसे की आप 10  लोगे तो आप की animation 10 sec की बनेगी।.


ये छोटे box आप के  Composition का color बदलने के लिए होता है। आप के composition  का  color  सामान्यतः black ही रहता है।


इस का color बदलने के लिए आप इस box पर click करीये। आप जैसे ही click करेंगे एक   popup color box  खुलेगा। आप यहाँ से अपनी इच्छा के अनुसार color ले सकते हैं।

अन्त में जब आप सभी parameters set कर लें तो Ok button पर click करें और आप के द्वारा की गयी settings आप के composition पर apply हो जायेगी। f


इस प्रकार से आप After Effects में Composition settings कर सकते हैं। अगले blog में हम Layer panel को समझेगे।

Design center in autocad

Design center in Auto Cad

As we know guys Auto Cad is computer aided designing software which is most popular among engineering designing professionals. Today we will discuss about design center and also get knowledge of major content of Design center of auto cad software which is a inbuilt browser of this software and you can find number of block diagram and their specific parameters of different component which we need during making drawing of any plan layout of particular project.

What is Design center in auto cad?


We can define design center as group of block diagram of different component such as furniture which we can use in our layout drawing of any project.
Today we will discuss about how to add furniture in autocad and also get knowledge about Design center of auto cad software which is a inbuilt browser of this software and you can find number of block diagram and their specific parameters of different component which we need during making drawing of any plan layout of particular project.


How to insert furniture in Auto Cad?


So let us start our topic with design center and we will import furniture from here in our drawing of auto cad.

Before going through this method let us have a quickly review on the User Interface of this software so that handling of this software become easy for us. Starting from top here we have different Menus such as Home menu, Insert Menu, Annotation menu and some others, each of them helps us for managing of command and tool of this software, move to next section that is display window which is at the middle of this software, in this window you can see your drawn object of any drawing or whatever you draw in this software that will be display on it, if we talk about button end of this software then there are many option of navigation which helps us in handling of parameters during our working in this software.

This is Drafting and Annotation workspace screen of this software which is set as by default screen of this software.

Click on image to see full image.


For opening popup window of design center you have to go click on View menu ab of menu bar then go to palettes tabs of this menu here this icon is know as design center icon, click on it for opening it


Or you can press Ctrl + 2 button as short cut command of design center or you can also type DC from keyboard for opening this popup box.


Now when you click on this button a or icon then a popup window will be open same as shown in snap shot here.


When you open it you can see the folder of design center is in front list in left side window area.


If you are enable to find it the you have follow these steps for reaching to this folder.
First of all click on plus button of program folder of c drive - then plus button of Autodesk - then plus button of folder of your auto cad software. My auto cad folder is auto cad 2020. 


Then click on sample folder - then on en un folder and you will have your design center folder here.


Now you can choose any one of options of different type of block diagram from the list of the design center.


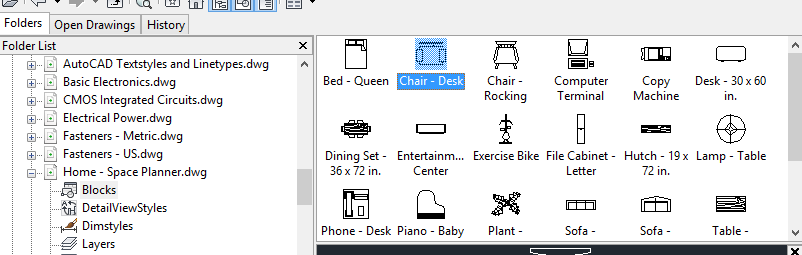
I will click on House space planner option because we want to know about muebles that are furniture in context of auto cad. When you make click on this option, you will find different parameters of it in the preview section of this window. Here we have blocks, data....and many others. You can import any one of the parameter in your drawing and use that parameter in your drawing.


Now let us understand through an example. I will choose blocks for our learning and when i make double click on it list of different block diagrams of various object of furniture will be open.


Now For opening the parameter box of any one object make double click on it and a popup box will be open.  For example i will choose Chair desk and make double click on it. I we will fill my desired parameter here for this object then click on Ok.


After making click on our selected object it will come on our mouse pointer and you can place into your drawing at your desired place by making click on that point.


It will look like show figure.


There is one more option through which you can import block diagram of any object in to your drawing. Just pick your desired object block from design center then drop it into your drawing at your desired place.


By this way you can insert furniture in your drawing.

How to edit furniture blocks in autocad


Now let us discuss how to edit furniture blocks in autocad after importing it in drawing. Now select this object by making click on it and click on anchor point and hold the click on this anchor point. Now you can move your object anywhere in your drawing.


For other modify option just click on the anchor point then press right button of mouse. A popup list will be open. You can choose any one of the modify command from this list.I will show you it by choosing Rotate command.


Now you can rotate this object by entering the value of angle of rotation or you can leave your object at your desired angle manually.


By this way you can use anyone of modify command of this list.

You can also import layer style of thus option and use it on your drawing.


So this is all about the design center  in Auto Cad. You can now handle its parameters without any problem and use it for making good plan layout of engineering drawing. After this article there will be no doubt in your mind about thus topic of Auto Cad.


After effects timeline

After effects timeline What is timeline in after effects Timeline is an important section of after efftect from where we make adju...